This is a step by step Picture guide that will show you how to set up your Apple App to be enabled for sending push notifications, create the proper certificates for sending push notifications.
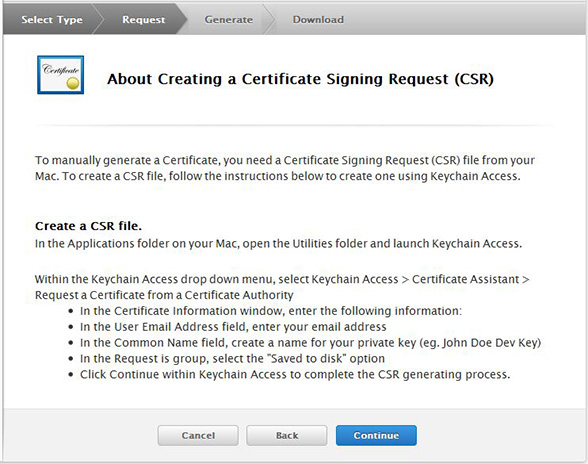
Step 1. Generate a Certificate Request
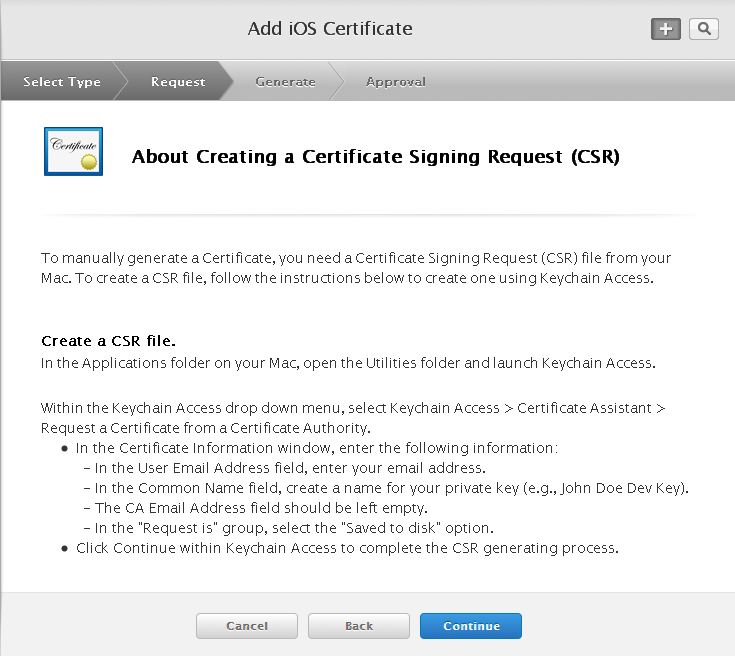
Go to Keychain Access - Choose Keychain Access -> Certificate Assistant -> Request a Certificate from a Certificate Authority.
Enter your user email address and common name. Use the same address and name as you used to register in the iOS Developer Program. Select the options "saved to disk" and "let me specify key pair information" and click Continue. Specify a filename and click Save to save the file CertificateSigningRequest.certSigningRequest to your desktop.
In the following screen select '2048 bits' for the Key Size and 'RSA' for the Algorithm. Click 'Continue'.
Step 2. Configuring an App ID for Push Notifications
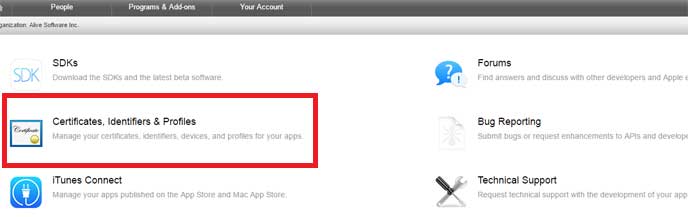
Now Log in to the Apple Developer Center and click "Certificates, Identifiers & Profiles".
Next click on "Identifiers" under iOS Apps to open the list with identifiers.
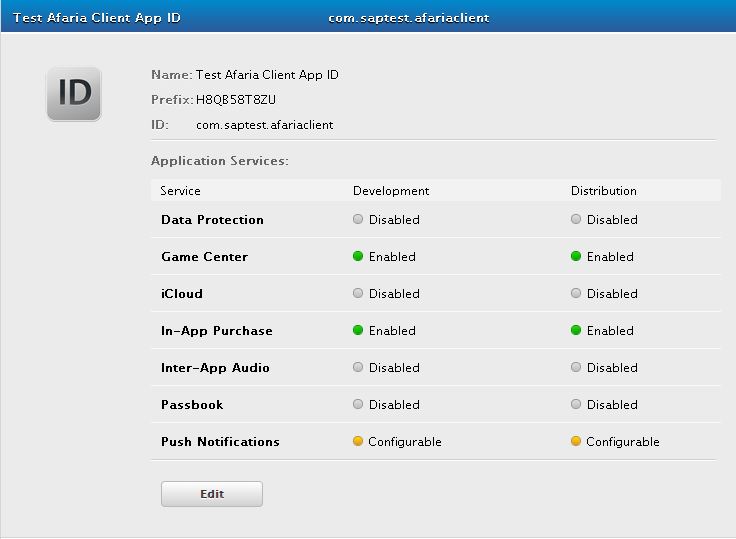
From the list of App IDs, select the App ID you are using for your app. Then click on the 'Eidt' button.
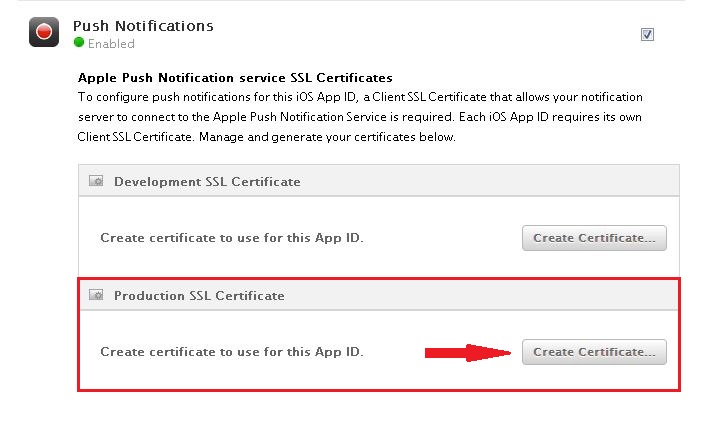
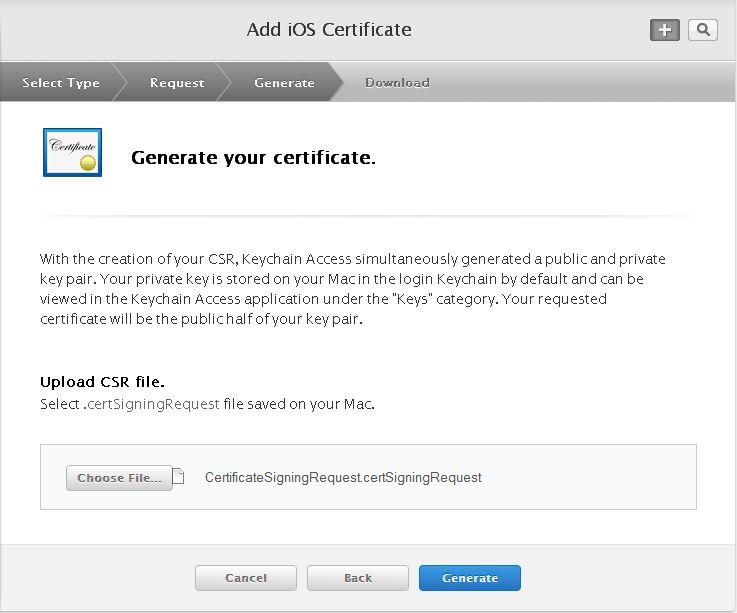
In the next screen, under "Push Notifications", select the "Create Certificate..." button for Production SSL Certificate.
IMPORTANT NOTE: If the "Push Notifications" service was not enabled on the App ID during the time you created it, you will need to redownload the Provisioning Profile after you enable "Push Notifications" service. Then add it into Mag2GO and select it in the app Properties dialog. Otherwise, push messages won't be able to be sent to the app.
Select Continue.
Click the "Choose File..." button and upload the CSR file you created on step 1.
After you click Continue, you will be asked to upload the Certificate Signing Request you generate from the first step of this tutorial. Simply upload it and click Generate button.
Click Generate. Once complete, click Download to receive the APNS certificate. The file will be in .CER format.
Step 3. Converting the APNS Certificate to .pfx/.p12 format
1. After the file downloads, locate the distribution_identity.cer file in your downloads directory, and double-click it to import it to Keychain Access.
2. In the Keychain Access window, select "Keys" in the left window pane under the Category section.
3. Expand the Name (the Common Name you entered when generating the CSR) that shows the "private key" under the Kind column.
4. Control-click (or right-click) the "Apple Production IOS Push Services..." key and select Export...
5. DO NOT enter password and directly click OK button to export the certificate.
6. Now, you will have the certificate in .p12 fofrmat.
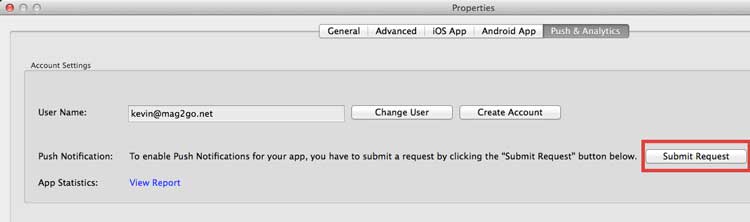
Step 4. Submit Push Notificatiion Request
Now go back to the Mag2GO and open the app Prpoerties dialog. Please select "Push & Analytics" tab click "Submit Request" button.
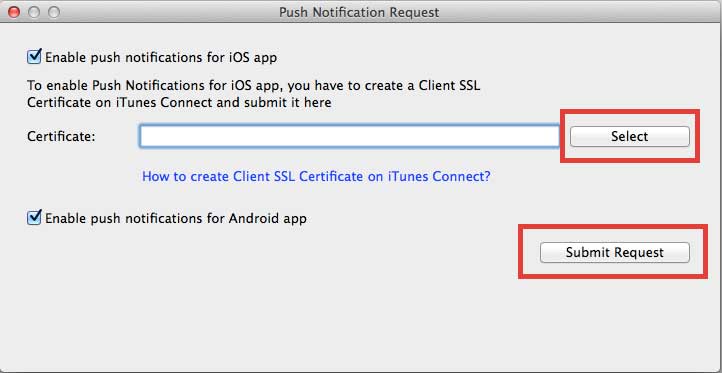
In the next screen, please click "Select" button to select the .p12 file you just downloaded. Then click "Submit Request".
After submitting the request, the status of Pubsh Notification will be changed to "Waiting for review". Once we approve it, the status of Pubsh Notification will be changed to "Enabled". Then re-build the app.
 Suite 1004, 3601 Hwy 7 East, Ontario, Canada
 support@mag2go.net